This is part two of a two part series covering the app creation process. You can read Creating iOS App Ranger Golf GPS: Part 1 here.

Key features of Ranger Golf GPS

Ranger was created with a single goal: to be the definitive GPS app for the driving range.

I wanted Ranger to be really good at one specific thing, instead of trying to be just OK at a bunch of things. To make sure that happens, Ranger users are presented with the GPS Target Screen right from the start. But, even though I wanted to focus on one task, I did want to provide some additional value. Ranger users can also see the relative wind direction (see below) and weather forecast, view how-to info, modify basic settings, and provide feedback directly from the app.

Hopefully, Ranger can continue to grow and add new features in a smart way, without degrading or complicating the core function of the app. I plan to be cautious adding new features, but still want to keep enhancing the app over time. To help prioritize new features, I’ve setup A UserVoice account and encourage Ranger Users to post and vote on feature requests. I like the idea of community-driven enhancements and other apps, such as Infinite Flight, are doing a great job of allowing the users to help drive future enhancements.

GPS TARGET SCREEN

Ranger Target

The primary function of Ranger is to provide accurate distances to any target on the driving range (or golf course) without a lot of taps, thought, or effort. To fulfill that promise, I decided to let the app fire up, ask for permission to find the user’s location, and then present the user’s position on top of the satellite view. In the beginning, I briefly considered leveraging a location DB like Foursquare, Yelp, Google, or others to show where the user was. But, quickly removed that feature because it would’ve complicated the development, cluttered the UI, and most importantly, provided limited benefit to users.

The main view controller contains the nav bar with 3 items: A lock button to lock your location (and save battery), the wind direction and speed (see below), and an info button that takes the user to the Help Screen and Settings.

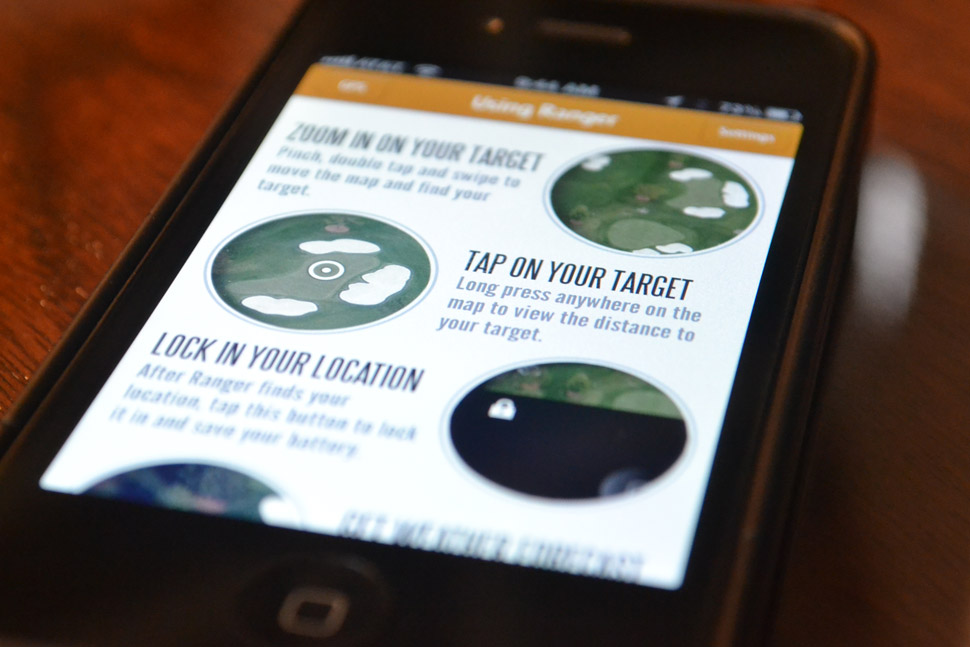
At the top of the view, the user sees a brief overlay with the 3-step process to get your distance: Zoom In, Press your Target, Hit Great Shots. This overlay automatically hides itself after a user taps the map. The main target distance is displayed in large type right in the center. I chose dark type on a light background so it would be easy to see outside. The rest of the screen is uncluttered allowing Ranger users to see the map below.

All a Ranger user has to do is long press anywhere on the screen to automatically see the distance. They can drag the target to a new location or simply long press somewhere else to change the distance. The new yardage is automatically calculated and displayed at the top of the screen.

Wind Direction Indicator

Ranger Wind Sketch

Wind direction and speed is a very important consideration for golfers on the course and the range. Every 10mph of wind roughly affects the total distance by one club length. So if a 10 mph wind is straight into a golfer’s face, a shot that would normally require a 7i will now require a 6i. This is really important when practicing so you can get an accurate idea of how far you’re hitting the ball.

I wanted to find a way to bring wind direction and speed into the app without complicating the experience. To do this, I decided to leverage weather data from forecast.io, determine the current wind direction at the user’s location, get the current heading from Location Services, and display the MPH and the relative direction of the wind. This was a fun process to figure out.

Just showing the wind direction – East 10MPH or NW 10 MPH – really isn’t useful if you don’t know the direction you’re facing. Ranger actually displays the relative wind based on the direction the user is facing and automatically alters the direction as they move. The most basic example is if the user is facing North and the wind is from the West, the wind direction arrow will be pointing to the right, indicating that the wind is blowing left to right. This is extremely valuable information and it was fun to work out the automatic animation/rotation of the wind indicator in response to a heading change notification. Just don’t use Ranger GPS in a USGA-sanctioned event!

WEATHER FORECAST

weatherscreen

I was originally interested in the Forecast.io weather API specifically for the wind direction feature. But the Forecast.io API is incredible and I wanted to find another legitimate reason to use the rest of the data. The data is insanely accurate, the API is solid, simple, and scalable, and the pricing structure is the best out there. The first 1,000 API calls per day are free and every 10k API calls after that cost just $1. Even though the API is straightforward, I leveraged a nice iOS library called ForecastKit to make the integration even easier.

I decided to create a Weather Forecast view. Instead of cluttering up the GPS Screen with another button, users can get to the the weather forecast by tapping on the wind indicator. The Weather view displays the current temperature, icon, and summary. Additionally, users can swipe through the weather icons for the next 9 hours. And since it’s important, the sunset time is also displayed.

I found a great set of beautiful and flat weather icons designed by Adam Whitcroft called Climcons.

HOW-To VIEW

How To Ranger

Ranger is a pretty simple app, but I wanted to include a hot-to section to make sure Ranger users wouldn’t be sitting there with the app wondering what to do. The design of the page is simple with limited text and an image highlighting key features.

Prior to launch, I assumed the majority of users would be in North America and Europe. But mostly USA. That turned out to be true, but I was surprised to see the app being used heavily in countries like Spain. Because the How-To view is one big image, localization won’t work. That means the help section of the site isn’t terribly useful if the user doesn’t speak english. In future updates, I’ll convert this to text and imagery to take advantage of localization.

Settings, App feedback and ideas

Ranger Settings
Since the app doesn’t require user login or many core features, the Settings View focuses on the distance measurement. Interestingly, the CLLocation class provides a method distanceFromLocation, which returns a distance between two points, but the distance returned is in meters. Ranger displays the target distance in yards by default, since that is the standard measurement in the United States, which required conversion. But, I wanted to make sure international users would find value, so users can change the measurement to meters or feet as well.

Since I decided to go all-in with this app, I wanted to give Ranger users a way to send feedback and get support. Any large-scale app would offer this functionality. I investigated a number of different feedback options including UserVoice, Apptentive, building my own, and others. Ultimately, I chose to go with a hybrid approach that would allow me to test out numerous services.

For in-app feedback, I chose Apptentive. They have a nice iOS SDK that is essentially drag and drop code. Specify a couple parameters and then trigger an overlay when a user taps feedback. With Apptentive, you can even allow screenshots to be attached. I looked at their ratings option, but had previously implemented iRate. That was a poor decision, as iRate has yet to trigger a Rating request. In the next update, I’ll be looking into why that is.

For the website, I wanted to offer a way to submit a feature request or support question. Uservoice seemed perfect. Their basic plan gives you a subdomain and the ability to customize aspects of the landing page. The support queue is easy to use, and Ranger users can submit and vote on feature requests. Right now, I haven’t brought in any Uservoice widgets into the getranger.com site, but I plan to. I do link to ranger.uservoice.com from the FAQ section of the site.

So far, I’ve had only one support question and one piece of feedback from the app, but both were actually positive comments and not support at all.

Beta testing with TestFlight

TestFlight is awesome. For anyone building an app, TestFlight should be the first service you sign up for after the Apple Dev Program. TestFlight makes it very easy to invite beta testers to try out your app. Instead of having to do all the provisioning, invites, and distribution on your own, TestFlight simplifies the process by handling the invite process, binary, and analytics.

TestFlight has an SDK making it very easy to receive analytics about the beta users. You can add checkpoints to know where your users travel and what they do in the app, you can see crash reports, session time, device information, and more. It’s simple for beta testers to get access to app updates and stay current as you continue through development. Can’t thank Ranger beta testers Chris, Andy, Mike, and Charlie enough for helping out.

ANALYTICS & APPROVAL PROCESS

Let’s start with the approval process. It took 5 total days. Prior to submitting the app for approval, I spent a lot time error checking, testing, and retesting the app in the iOS Simulator for non-retina, retina, and iPhone 5. I also tested on an iPhone 4S as well as continued to rely on beta tester feedback. I spent a lot of time reading the Apple App Store Review guidelines making sure I could check off every box. Once I submitted the app, I became obsessed with the status updates, which were very good from Apple and I watched http://reviewtimes.shinydevelopment.com/ to see the average review times, which proved to be spot on accurate.

I haven’t (and won’t) do any paid advertising to drive downloads, but I have done everything I can to optimize my App Store profile. From selecting the right keywords, to optimizing the title and first paragraph character lengths. I added screenshots for non-retina, retina and the 5 and all the individual app icon sizes recommended.

For analytics, I’m using Flurry. Originally, I wanted to continue to use TestFlight, with their new product FlightPlan. FlightPlan promised real-time app analytics and it would’ve allowed me to leverage the same checkpoints and code I used for the Beta Testing process. Unfortunately, FlightPlan was just launching and wasn’t producing the data I wanted during testing. I considered Google Analytics and Flurry. Either would’ve been good choices, but honestly, I wanted to try something new so I went with Flurry. Easy SDK to integrate and the same basic code as TestFlight to trigger sessions and events. The data isn’t in real-time, but I’m very impressed with the amount of data I have access to. And 300,000 other apps can’t all be making a mistake going with them.

Results so far

Ranger App Store
As for usage, I’m blown away. I really did create this app because a few of us hardcore golfers wanted it. If we were the only people who used it and got value from it, that would’ve been fine with me.

Since launching on May 25th, the app has been downloaded over 1,500 times in 39 different countries and all used in all 50 states. Ranger users have fired up the app over 8,000 times, spent over 150 hours in the app, and found distances to over 25,000 targets. Ranger is currently averaging over 30% active users, 2.8 sessions/ week and over 100 active users/day. The United States and UK have the most active users, with California and London providing the most active users in each country.

I didn’t anticipate the app being downloaded in so many countries and I didn’t spend much time worrying about localization. The app employs the basic localization, but in future updates, I will need to change the Help Screen from being a solid image, to being a text/image hybrid, which will allow the app to be much more multi-language friendly.

These results might seem sad to some developers, but this is truly just a fun side project and I couldn’t be happier with the results. This project gave me a reason to investigate many different products, experiment more with iOS, and ultimately saved me and few others from having to spend $250 on a laser rangefinder! It will be fun to see where Ranger Golf GPS goes from here.

A few people have asked about the app creation process so I decided to write a couple posts. This is post one of two. Part one covers the background info and part two covers the core features and results. You can read part 2 here >

WHY RANGER GOLF GPS WAS CREATED

Ranger Featured

The core group of guys I play with wanted a GPS app to use while practicing on the range. We wanted an app like this and I wanted to create it. Like a lot of golfers, I use a GPS app to provide accurate distances and keep my stats on the course. But these apps don’t allow you to get distances on the driving range, just golf courses that have been mapped. Also, driving ranges typically mark their distances to one spot, forcing you to guess the actual yardage to the targets. To get accurate distances on the range, you’d need to pay a couple hundred dollars for a laser rangefinder, but if you’re not going to use that on the course, what is the point.

Ranger was created with a single goal: to be the definitive GPS app for the driving range.

Ranger has been a really fun side project. I don’t consider myself a developer. I’m an interactive product guy that can dig in and code to get things done. I like the challenge. With Ranger, I could’ve simply created the app and used ad-hoc distribution to shoot it to a few friends, but once I decided to invest time in the app, I wanted to go all in. I wanted to build this app as if it was my primary job and I was going to build a business on the back of this app. This post is about the process of building and launching Ranger Golf GPS for iOS.

THE NAME, LOGO and iOS

The name and logo ended up being the easiest part of this process. I wanted to come up with a one-word name for the app (why go against conventional wisdom) and it only took a few minutes of brainstorming to decide ‘Ranger’ was the name. The play on both “driving range” and “range finder” was almost too obvious. I was surprised to find that there wasn’t a driving range (or GPS app) with that name already. There are a few other aps in the App Store that combine Ranger and GPS, including a set of Park Ranger apps, but I felt like the name was solid and went with it. Ranger.com was taken, but I snatched up rangerapp.com and eventually getranger.com, which became the final site URL.

I had two versions of the logo. The first was a mixture of an “R” and a target symbol, using the target as the round part of the “R.” But that didn’t look great and I moved on to the second and final option, combining a flagstick flag and an “r.” I sent it to a couple people who instantly liked it and I was done. The logo is at the top of this post.

The decision build Ranger for iOS over Android was an easy one. I’ll admit I’m a fanboy and the core group of guys I was building this for are all fanboys, too. But that aside, I likely would’ve chosen iOS anyway. Many large-scale app startups start with iOS. It is widely recognized that the iOS platform provides a more consistent experience and makes it easier to get the first app out the door. I’ve already had requests for an Android version – which I’d like to build – but I’m not sure I can really create and support the app across two platforms doing this as a side project (hobby).

Design

Ranger GPS Styles

My goal with Ranger was to create an app that was really good at one specific thing, instead of tying to be just OK at multiple things. With that in mind, I wanted to keep the interface very clean, simple and uncluttered. I also wanted the app to have a flat look, without a lot of textures or gradients.

The typography needed to look good in all caps, and I wanted it to have a condensed feel. Any icons created would be flat and simple, adding to the overall look.

I didn’t want to have a traditional tab bar because the core functionality would be contained on basically one view and I wanted to maximize the viewable area. With mapping and yardage being the primary elements on the main view controller, I tried to keep the nav bar as thin as possible while still providing easy-to-tap buttons.

The grey color was easy and I need to give my wife Andrea credit for the gold color. She said “… why not use one of the colors of a traditional tee marker, like gold.” I was sold.

The flat, simple design turned out to be a good idea. Apple’s new iOS7 UI is flat and Ranger will only require a few subtle tweaks to comply with the new guidelines and still support iOS6, which I will do for at least the next update or two.

Free, Paid, or Ad-Supported

Ranger iAd

Ranger is a free app and always will be. But, it didn’t start that way. Originally, I had planned to charge for the app. I didn’t plan on really marketing this app or trying to get wide-scale adoption, so I thought, why not charge $3.99 and if I sell 100 of them, great! But as I got further into the development process, I started to become interested in getting Ranger in the hands of as many people as I could, and going free was the only way to make that happen.

That said, I never gave up on the idea of making some money – even just enough to cover hosting – and decided to integrate iAd and in the future, an in-app purchase to remove those ads. I went with iAd because the integration was relatively straightforward. I looked into different ad platforms and the idea of having fallback ads when iAd doesn’t serve an impression (basically anywhere outside of the USA, UK, Spain, Australia and few other major countries), but that process would’ve added a significant amount of additional development and QA with a limited payoff.

Once I added iAd into the mix, it instantly added a few additional nights of development and conditional statements to the process. iAd requires that you not serve a blank ad impression. That means that I have to ensure there is an ad impression and show the ad, but be prepared to remove the ad if a future ad doesn’t fill. I need to be prepared to monitor the serving of ads even while on other view controllers and show/hide the ad appropriately. Failure to do this will almost certainly result in the app failing the review process. The code to do all this isn’t complicated, but testing each and every possibility was time consuming and made me wonder if I really needed to integrate ads to being with!

In a future update I’m going to offer an in-app purchase to remove the ads. The ad unit itself is only on the main GPS screen and is at the bottom. It really doesn’t interfere with the design or use of the app, but in-app purchases are where the app store $ are flowing and removing the ads will be the first in-app purchase Ranger will offer.

Apple Maps vs Google Maps

Ranger Location Services

This question required a lot of research and a pro/con list. When I started the development, Google had not officially released their SDK. Apple Maps was the only option, and MapKit wasn’t getting a lot of love. Because it was the native option, I could drop an MKMapKit onto the viewcontroller, wire it up, and I was good to go. I could focus on the more challenging tasks. However, Apple Maps, to be quite honest, doesn’t provide the level of clarity of Google Maps.

Midway through the development Google released their SDK and I was intrigued. I setup a couple of test apps and I liked what I saw. The clarity of the satellite imagery was much crisper, and since Ranger relies on being able to see the targets, that is very important. GMaps also allows the user to rotate the map with two fingers. That becomes very important when the targets happen to be heading any direction other than north. People like to view their map (and targets) the same way they are looking, which is straight ahead.

Apple Maps fell short in both of these critical areas. That said, those areas are “nice to have.” One of the requirements of Ranger is that a user could drag the target to any other location to find the distance. GMaps did not (and still doesn’t as of this post) allow users to drag a marker. As much as I wanted to use Google and have those beautiful maps and user interaction options, I had to go back to Apple.

I considered leveraging the Heading data point from Location Services, and rotating the map to match the heading. It is doable, but again, a nice to have feature. And with iOS7, I believe the rotation option will be included.

To date, Apple Maps has performed well. There are certain cases where the fidelity of the maps causes an issue, like with water-based driving ranges, but I can’t control (or test) for all those conditions. We’ll see what happens with iOS7.

Responsive Website and Twitter

iphone_three_hero_large

The last piece of development that needed to be done to create a solid app and support infrastructure, was a responsive website – http://getranger.com. Like I did for this site, I leveraged Zurb Foundation for the responsive framework. To go with the design of the app, I wanted to leverage a big visual, clean and simple design, and the fonts and colors from the app. The site is simple, but has the opportunity to grow.

In addition to the site, Ranger needed a Twitter account – @RangerGPS. As of right now, the account has posted mostly status updates about the process and a few golf-specific posts. I’m also using it to post screenshots of Ranger showing the distance to specific pins at major PGA Tour and European Tour events. Ranger isn’t the first to do this, but it is a fun way to promote the core feature of the product and provides a great reason to tweet on behalf of the app.

IN THE NEXT POST, WE’LL COVER THE KEY FEATURES AND RESULTS SO FAR. READ IT HERE >

WHERE HAVE I BEEN

It has been quite a while since I wrote my last post. I’ve been playing golf and practicing (and making some interesting progress with my swing) but I’ve also been building a GPS App for the driving range.

Ranger: Driving Range Golf GPS was built with a simple, single goal…. become the definitive GPS App for the driving range. With that in mind, I tried to simplify the experience and make it easy to find yardages to any target on any driving range or golf course. I built this for the small group of friends that obsess about golf like I do. But to my surprise, it has been downloaded over a 1,000 times in 37 different countries.

I’m planning to write another post about the development, the hurdles, process, decisions and progress. It was a lot of fun. You can download it for iOS here or check out the website here.

How it went

Great range session today, one of the best I’ve had in a very long time. For whatever reason, my hang up is taking it from the indoor hitting bay to the range. And of course on to the course. But today was a different story. I managed to work my way through the bag hitting solid shots with every club, even the driver.

Some keys for me:

  • Solid setup, back to being a bit closer to the ball and more upright
  • Start back completely connected and quicker. Got to be quicker
  • Feel like I’m keeping pressure against the right leg and a bit more weight on the front at the top
  • Dont move my head off the ball
  • Drive down and forward from the top
  • Drop the hands down in front of me
  • Swing on through

Divot pattern was better, Swingbyte numbers were better from a speed, tempo and attack angle perspective. Most importantly, the ball flight was fantastic. When I followed the keys above, the strikes were crisp and pure and flew for days. As I got to the end of the bucket, I noticed I was reverting to old habits and so I was hitting it fat. I need to stay focused on every shot.

I was hitting wedges better than I ever have. Right at the pins and good distance control. Same with the irons, even the longer irons. This swing feels like I leave more weight on the front, but in looking at video, I’m actually just getting into a more proper position and driving with the body better. The more I “feel” like I’m loading up on the left leg and pushing against the right, the better. It keeps my head stable and keeps me from swaying which is giving me much better contact. And I’m forgetting about the arms and my inside takeaway for now. Yes I need to mess with it and get it more neutral, but I can worry about that later. This is a natural move for me and I’m comfortable with it.

The swing is a FADE swing, without question. I still have a tendency to close the face and hit pulls and pull draws/hooks, but the majority of these shots were straight and slight fade, or 5 yard fades. I’ll take it, as long as its consistent.

But overall, it was just great to get out there and hit quality shots at targets with a variety of clubs. Helps the confidence. I just need to stick this out.

Over the past few weeks I’ve been working hard on my swing. It feels like a year ago where I’m trying to make a major change in my swing and I’m just getting as many swings in as posible to break old habits. When I execute the new-ish swing, the results are excellent. A more penetrating flight, a nice draw, better balance and just a crisp strike.

Been focusing mostly on keeping my head still and not overswinging. I’ve been moving way off the ball and thats a recipe for inconsistency. I’ve also been investigating why I’m swinging to the inside taking it back and then coming through. I finally realized that I’m not lifting my arms at all. Obviously, I don’t want to lift them too much, but I’m so flat and inside that I almost dont have a choice but to reroute over the top to get to a better position. When I’m on, I’m on. But I want more consistency.

Focusing on these points…
On the way back, raise the left arm slightly instead of keeping it pinned.
Stop backswing when shoulders stop
Grip the club a bit lower
Give the arms a bit more room
Start the swing with upper and move naturally into right side.
Start back down from a more centere position
Swing left feeling like the handle is lower thru impact and end with a balanced finish

The Experience

The Freakonomics Golf Experience was a 3-day golf event at PGA Village in Port Saint Lucie. Luke Donald, his coach Pat Goss, Stephen Dubner & Steve Levitt (authors of Freakonomics and very great guys) are combining forces to write a golf book and this weekend was setup to provide a ton of data. I found out about the opportunity via a tweet from Pat Goss, applied and then kept my fingers crossed that I’d be selected. It was an opportunity of a lifetime and I’m so fortunate to have been selected to participate in the event. It was truly unbelievable!

I had my assumptions about what the weekend would hold. 9 holes on Friday, 4 hours of drills, challenges, and 18 holes of golf on Saturday and then 18 holes in the morning Sunday with 3 hours of drills in the afternoon. I assumed a lot of emphasis would be placed on the short game with a lot of practice on the short game area. And I assumed we would be tracked during our round to gain data on where we hit the ball, the clubs we selected and how we scored. I was right about all of that, but it was WAY more.

The PGA Learning Center

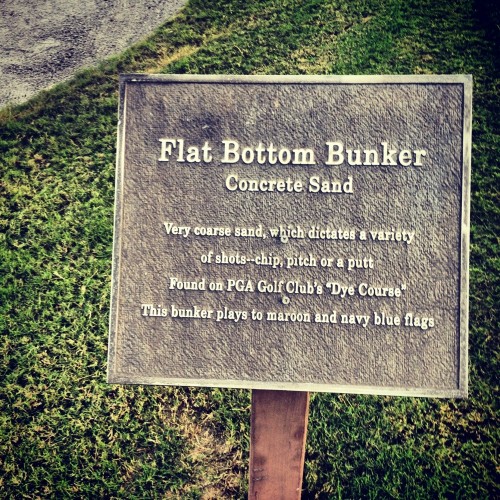
6 Differnt kinds of sandThe PGA Village Learning Center is amazing. If I lived in the area, I would be here all the time. When we walked thru the arch leading to the practice area, I was instantly hit by the size of the complex. To our left was a big putting area and to our right was a big putting area. Directly in front of us were 6 bunkers with 6 different kinds of sand. Come on, where else will you find 6 different kinds of sand. The Learning Center is a massive circle, with putting, chipping, bunker areas, and short par 3-type holes lined along the edge and hitting areas inside. It took us about 10 mins to walk to the back of the Learning Center, which Freakonomics completely took over. In short, this place is golfer’s heaven.

The Format

When we arrived, we were given an individualized schedule. We played the rounds with our set group of Chris, Andy and I, but our practice was based on our handicap and current game. We were given a skill to practice each day, mine was putting from off the green, as well as Flash Tests and 2 Diagnostic Tests – putting and short game. The diagnostic tests could be done any time during the weekend, but the Flash Tests had to be done that day. Any time left over could be spent hitting balls on the range, doing a Trackman experiment, or completing any of the other tests or experiments. I wanted to do it all and maximize our time there.

Practice

I’ve never had the ability to practice for hours a day without having some level of guilt creep in. This is as close to having a pro’s schedule as I’ll every get. Between tests and experiments, I was able to hop on the range, drop some balls and practice. I could run over to a chipping area and practice putting from off the green. I was required to practice at least 20 mins on that skill. “Required!” Yes, please. I knew the weekend was going to be a long one, so I tried to avoid hitting a ton of balls on teh range, even though I could’ve camped out there all day long.

Bunkers at PGA Village

Diagnostic Tests

I completed the putting diagnostic first. We had to putt multiple balls from multiple lengths around a hole with varying distances and breaks. I was solid up to 12′. At one point I had tied the record for the most putts made. But as I worked out past 12′ my game started to break down. I wasn’t rolling them in and I even 3 putted. Once we reached 40′, I had really started to degrade. Bottom line… I need to work on my putting. I would do a lag test on Sunday, after getting some feedback from David Inglis about taking a longer backswing, and rolled more putts. But I need to spend time out on the greens and really focus on making good putts. I noticed that I wasn’t taking my calm, tension-free swing to the course and that my setup wasn’t the same. I need to focus on that.

The same thing holds true for the short game diagnostic. We had 9 stations from varying length and had to hit 3 balls at each station. I scored a 35. By comparison, Pat Goss had a 38, Steven Levitt had 37 and Luke Donald scored a 45 (the best, no surprise!). But I was confident and just hit the shots I felt I needed to hit. On the course I was tense. Shocker. The nest time I go out to play a round, I’m hitting every shot as if I was on the range. Its clear that my worst shot going after it with confidence is no where near as bad as my worst shot when I’m tense.

Flash Tests

Multiple tests at PGA VillageFlash tests were setup to test us on key skills like lag putting, trouble shots, and chipping from < 30 yards. These tests really gave me a clear picture of where I need to spend more time. I didn't do poorly on any of the tests and I didn't expect to do poorly based on where my game is at right now. But I also know that for me to get into the single digits and be a consistent 70s player, I need to have a solid short game and this really highlighted that work needs to be done. I really liked the tests. They added a bit of pressure which kind of simulated the feeling on the course. I could also see some great data opportunities for the Freakonomics team.

The Experiments

The experiments were excellent. They ranged from playing a long par 3 to playing a short par 3 and basically everything between.

We started Friday with a little Par 3 experiment. We got to the tee and had a green about 100 yards in front of us with 2 flags, one left and one tucked back right guarded by water in the front. The flag on the left was 93y and the right flag was 105y. We were instructed to play our first shot at the left flag and we would putt it out. The second shot was to be played however we wanted and we didn’t know which flag we would be asked to play to. The idea here was clear. Do regular mid-handicap golfers score better when they play at a flag or play for the middle of the green. I did this experiment 2X this weekend and I scored better when I went for the middle of the green.

Another experiment had us putt 4 balls from 3′ around the cup. The first time, we were asked to be aggressive. The second, we were asked to die it in the hole and the third time we were instructed to hit it however we normally would. When I was aggressive, I made more putts.

All the experiments were well thought out and a lot of fun. Being able to simulate on course conditions without having to be on course allowed us to still think and act as though we were playing for real, but still have the comfort of the range. I need to bring this feeling to the course!

Trackman Experiment

Given my obsession with data, this was one of my most enjoyable tests. The first day we were there, the Trackman was setup on range and we were able to test our distance control. By the time we got there, the wind had picked up and was gusting to 20 mph. it was a 2 club wind and we were hitting straight into it. We had to hit 3 balls to set distances starting at 90 yards and up to 190 and focus on carry distance, not total distance. We were given our carry distance each time and allowed to change clubs if we wanted to. I have a decent idea what my distances but it took me a swing or two to grasp the 2 club wind concept. But once I had the club, I was close. Surprisingly enough, my most accurate distances came with the hybrid, which I hit within 3 yards of the distance. But I took David up on his offer to change clubs a couple times to get closer to the number. And having that info helped me through the weekend as the wind was a constant feature on the course.

On Sunday I completed another Trackman test, but this time the goal was to go straight at the flag, then right, then left. Again, I was hitting it really well. I was drawing the ball nicely, even fading it nicely, too. I had a few shots that landed to within < 1y of the target and managed to hit my hybrid right on the number at 190y out. The thing that struck me about the Trackman experiment is that I went after each shot without hesitation or nervousness. When I did that, the numbers and the results were great. out of all the shots I hit I can count on one hand the number of shots 20 yards offline. But when I think about the rounds I played on the course, I had many shots greater than 20 yards offline. This further reinforced my need to take a more confident approach to the course. David was also nice enough to run through a few of my numbers with me. My driver was spinning way too much and I need to remember on the course to keep the ball forward. I was hitting down on it and spinning it. I saw that on the course quite a bit, too. My distances are good and if I can get my consistency and confidence under control, I can stop worrying about distance, I hit it far enough for an amateur.

The Rounds

Can we take it to the course? We had a tracker with us each round taking note of each position we played from and our overall score and # of putts. They couldn’t help us with the game or the course, they were there to track. The rounds were a lot of fun.

Dye Course – Friday
Wanamaker Course – Saturday
Ryder Course – Sunday

The Course

The Ryder course is a fun course to play and one that you can definitely score on if you are playing well. The fairways have generous landing areas and in comparison to Wanamaker, feel like you’ve got an entire football field out there to land it. I didn’t get the sense that the course had as much undulation to it in the fairways, but I could be wrong. But like Wanamaker, there were some really cool holes that make you think around the course. The condition of the course once again was excellent. The greens were in great shape and the fairways were beautiful. Aside from the greens on the Dye course, all the courses at PGA Village were in great shape.

For today’s round, we were going to have a coach/caddie with us. Part of the goal of the Freakonomics weekend (Sub Par Thinking) was to prove that amateurs can shave strokes off their score without changes to mechanics, by simply playing smarter. For the weekend, we were going to have either Pat Goss or David Inglis. My first thought was “Are you Serious!” Having Pat Goss, one of the game’s best coaches, lead you around for 18 would be awesome. But by chance, I had worked with David during a Trackman experiment on Friday. As cool as it would’ve been to have Goss as our coach, I was actually hoping we would get David. He’s an accomplished player in his own right, having played on a Walker Cup team, and is now the Asst. Golf Coach at NU. He was great to work with during the experiment and I was very happy when he rolled up and said he would be our coach.

Our only requirement was to embrace the experiment and follow instructions from the coach. I’ve played really well in the past when we’ve had a caddie (Cascata 79) and was ready to follow an instruction. The first one…. putt for at least 15 mins before the round to get a feel for the greens.

My Round

We teed off at 7:50a on Sunday and played from the Tournament tees. The other rounds this weekend were played from the White tees. The reasoning given for this was to offer us some fatter landing areas. Given my average distance off the tee, the length of the course shouldn’t be an issue and today it wasn’t.

I started the round with a driver down the middle of the fairway and an approach shot that went left, but on the green. I was disappointed with the approach shot because it was a good 40 feet left of the pin when David had given me a line basically just left. It was a pull. And it was a shot I would have to get used to all day long. I hit the first 4 fairways with Driver and 71% on the front. My driving was not the issue. My approach shots were the issue. I was left all day long and I believe it was just a straight pull because I was consistently lined up right. In fact, David had mentioned it a few times during the round and after my tee shot on 18, David said “you know what, you were aimed left that time.” It felt like I was way left. But its something to work on.

I played a solid round with the longer clubs. My short game let me down. I wasn’t confident with my chip shots and I certainly wasn’t confident with the putter. Aside from #1 and #9, my other two GIRs on the front led to 3-putts. There were some fun shots. Like taking a 3W off the tee on #4 and hitting a perfect 250 yard shot with a slight fade to the middle of a dogleg right par 5. I had 215 to the pin over water with bunkers right and left, but a deep green. I was surprised when David said hit the hybrid about 10 feet left of the pin. I said “really” and he responded “you can hit it 200 yards, right?” All of his comments were valuable today, but times like that one really gave me some great insight in course management. I had assumed he would have me lay up and play safe, but in this case, the payoff for hitting the green in 2 far outweighed the risks of going in the water. The water never crossed my mind, and that was his point.

My favorite shot of the round came at #9. I went right off the tee but was long enough to clear a waste area and end up in the short rough. My ball was sitting nicely, with a great line at the pin and about 180 yards away to an uphill green. The pin was tucked in the back right corner about 6 feet on the green and directly behind a bunker. I had a tree about 50 yards in front of me that left me only a slight glimpse of the flag, but no danger of hitting it. David gave me a line to the center of the green and I pulled a 6i. As was common, I ended up aiming directly at the pin and flushed a 6i with a beautiful straight flight. I watched it fly over the bunker and bounce once but couldn’t see where it ended up. With a big grin, David said, pretty nice push! I’m sure I was aimed that way. I got up to the ball and it was 3 feet from the pin. Its one of the coolest shots I’ve ever hit. I rolled in the putt.

I had some chunky shots and some poor swings, but for the most part I was swinging the clubs well, I just wasnt hitting them online. At one point I apologized for not giving him much to work with. I really wanted to hit quality approach shots and give myself a chance for birdie and at least par. But on the front, I didn’t really do that. My back 9 was better. I had five pars but actually hit less GIRs. I wish it would’ve been more consistent but it was still a blast. On 18, I was left with another 180y shot from behind a tree, in the rough to a right hand pin. I hit another great shot that was a little long, putted down and made par.

This entire weekend was an absolute blast and I’m very lucky have had David take us around the course. The Northwestern Golf team is lucky to have him as one of their coaches.

Scorecard

Ryder Scorecard

Photos

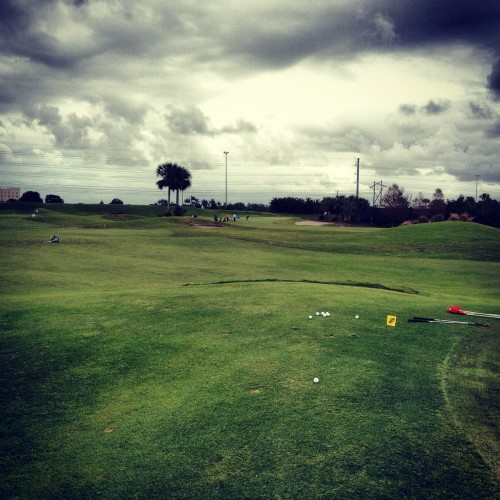
Nice little range at PGA Village

Who doesn’t love to see these pretty little pyramids all stacked up and ready to go

The Course

The Wanamaker Course at PGA Village is by far the best of the three main courses. It isnt completely fair for me to say that without playing the back nine of the Dye course, but I think its safe to say. The course is the most challenging (on paper) of the courses at PGA Village and it played as difficult as we expected. There were some fantastic holes, including long par 5s, par 3s with tough greens and even short par 4s. The course condition was almost perfect. Even with all the rain, the greens and the fairways held up nicely. And these greens, unlike the Dye Course, were rolling pure and smooth.

My Round

This was a challenging round. For one thing, it was raining off and on the entire round. We had also spent the entire morning practicing and hitting balls, which was awesome. For another, we were going to miss Luke Donald giving a masterclass in putting and short game. I had known for a day or so that Donald was going to be doing many of the drills we were doing throughout the weekend and because of our afternoon tee time, we would miss it. But I tried to put it out of my mind. Unfortunately, the front nine was brutally slow taking almost 2 hours and 45 mins. By the 9th hole, we were concerned we wouldn’t even finish the round. In my mind, if we weren’t going to finish the round, I would rather quit at 9 holes and go watch the greatest short game player in the world.

But we made the turn and with that, I changed my atitude. I went birdie, par, par to start the back. I was driving the ball extremely well (86% on the back) and after driving 3 holes in a row, I got back on a par run with 16. As we approached the long par 3 (over 200 yards) 17th, we could barely see and the rain had picked up again. I hit a hybrid to pin high but 40 feet away leaving me a sidehill/downhill putt. I took a confident stroke and rolled it in the high side for birdie. If I had missed the hole I would’ve been 10 feet past. I went to the par 4 18th sitting at 33. If I par 18, I shoot 37 and my best 9-hole score ever.

By this point, we couldn’t see anything at all and wondered if we would get called off the course. 18 is a great finishing hole. A medium length, dogleg right with a long fairway bunker that guards the right side of the fairway leading to the edge of a lake that guards the rest of the fairway all the way to a green. The smart play is to take a fairway wood. I grabbed my RBZ 13º and hit a solid shot up the right that finished at the front of the fairway bunker. I’m lucky I didn’t flush it, I would’ve been in the water.

My lie in the bunker was good, but it was close to the edge. I needed to fly the ball 150 over water and had to aim a little left of the green. I took a 7i and gripped down. I normally would’ve taken 8i, but in this case I wanted to make sure if I caught it fat, I’d have enough club. I hit it solid, but left and long. I was left with an uphill chip to a downward slopping green and needed to get up and down for par. I had to leave the chip right on the top of the mound and let it trickle down, but I didn’t get it enough. The darkness made it so hard to see. I putted down, missed the putt back and doubled the hole. I still shot 39, and after the terrible front 9, I felt really good about it.

Scorecard

Wanamaker Scorecard

Photos

Wanamaker Course PGA Village

I just wanted to roll around on this turf. The course was in beautiful shape

Wanamaker Course - Didnt work out well

This shot didn’t work out well. I got too aggressive and ended up in the water right

The Course

PGA Village as a whole is incredible. With five courses and a learning center, this place is a golfer’s dream. We were only scheduled to play the front nine on the Dye course and unfortunately, I don’t think the front nine was the best nine. I’m a big Arthur Hills fan, and he didn’t disappoint. The course felt links-like, with undulating fairways, natural grasses, and large waste areas. It is a fair course, with decent landing areas for tee shots, approachable greens and if you’re playing well at all, not a ton of danger. The issue with the course today, were the greens. I’m not sure if they had just been aerated or worked on, but many of the greens were very sandy which made it difficult to get a consistent roll. The rest of the course was in great condition.

My Round

I ended up playing well overall. It was the first round of a long, exciting weekend, and I got off to a rough start probably just due to excitement. I bogeyed the first four holes and putting was a big issue. I hit 2/4 greens in that stretch and on each GIR I 3-putted. From #5 on I went on a great run of par, par, birdie, par, par. My putting on the last 3 holes saved me. On $7, a par 5, I hit a great drive leaving me a chance to get home in two with a hybrid. I hit the hybrid over the green, chipped it close and got down for a birdie. It was a great hole.

My irons were good, but not solid. But I wasn’t worried about it. It was the beginning of a long weekend and I was excited to get going. My driver helped me out. I was having alignment issues, as I have been lately, and that trend would continue through the weekend.

My Scorecard

Dye Course Scorecard

Photos

20130125-143213.jpg

The course has a great mix of natural areas, bunkers, and prime fairways

The Course

The Ocean Course at Half Moon Bay might be the most beautiful setting for a golf course I’ve played yet. Its right on the water and almost every hole has a glimpse of the ocean, with the finishing holes running right next to cliffs. The view alone is worth playing here.

A links style course designed by Arthur Hills, The Ocean Course does a great job of feeling like a links. The setting certainly helps and when the afternoon breeze kicks up off the ocean, you almost feel like you’re playing in Europe (maybe, I wouldn’t know from experience). The course is fair and not particularly long. The greens, fairways, and rough were very well maintained. I was surprised by the size of the greens, so of them were massive. Since the holes run parallel, its difficult to lose balls on most holes, but its possible. Winter rules were in play which meant cart path only, which was kind of a drag, but understandable.

But the main aspect of this course is ocean. I’d pay here again in a heartbeat.

My Round

I had a blast, so lets get that out of the way. From a technical perspective, I played pretty good. The same issues continue to creep up. Inconsistent contact and a sub par short game added a few shots. I really need to spend time on and around the greens.

I also had some course management issues that bit me on the back. I was in a fairway bunker on 16, close to the lip with about 170 left to the center. I knew when I looked at the lie that getting a 6i over the lip would be tough and I should just take a PW and send it down the fairway, chip up close and try to 1-putt. But I didn’t do that. I hit 6i and embedded in the bank, took a drop, hit the PW perfectly and went on to a triple bogey. That mistake essentially cost me the chance to break 80 as I spiraled out of control after it.

Don’t do that again! But I still really enjoyed the round, it was a blast.

Photos

So many holes right on the water

Talk about a distracting view when you’re trying to putt

Right on the water

This view is right off the 17th tee. Stunning